Category Archives: healthy cooking

Recipe: Baked Tofu Egg Rolls


Did you know it’s currently National Vegetarian Week? If ya didn’t, now ya do, so go out there and eat a carrot or ten!

I do love myself a beautiful piece of rare meat now and again, but I find that I cook vegetarian more often than not even though I’m not consciously planning it. I guess it may have to do with the fact that I don’t really know what I’ll be cooking on any given week and therefore rarely buy meat or fish on my weekend shopping trips and prefer to buy it the day of when I figure out what’s for dinner. Add that to the fact that I’m usually running behind, and it leads to me making our meals out of whatever we have on hand, which is always vegetables and some sort of protein that keeps well for longer periods than fresh meat, like tofu, cheese or beans. Continue reading

Recipe: Spring Vegetable Frittata

I hate to start off a Sunday afternoon post with a rant, but I just have to get it out. I’m done paying money for bad meals and mediocre food. Just done. It seems I’ve had some bad luck especially when it comes to breakfast or brunch outings (there have been a few dinners as well, darn it!), and I guess it’s partially my fault for trying to tweak a scramble so it’s made with egg whites or to ask for “easy cheese.” Maybe I should just order an omelet the way it is without adjustments. But even as I type that sentence, I’m not totally convinced that trying to eat relatively healthily at a restaurant is reason enough for a bad plate of food. What restaurant these days doesn’t offer a “substitute egg whites” option anyway? They all do, right? Grrrrr….. Continue reading

Healthier, 134-Calorie Cheesecake

Ed note: Hey, welcome to the new, improved, Doppler 12,000 version of Tuna Toast! It’s nice to finally be here, and I’m so glad you’ve joined me. Read more about this blog and other new, exciting (well, to me!) happenings by clicking on the “About Me,” “Catering/Baking” or other tabs.

I know what you’re thinking.  How can healthy cheesecake be any good?  After all, the best thing about a cheesecake is how dense, rich and utterly sinful it tastes. Which is exactly why I tried to create a slightly lighter version- so I could experience the goodness that is cheesecake much more often.  And guess what?  It worked!

Continue reading

Recipe: Miso Glazed Salmon

If you’ve ever dined at a Japanese restaurant, you’ve probably had a miso-glazed fish of some sort..most likely miso-glazed cod.  It’s ubiquitous on most Japanese or sushi restaurant menus, and I really think it’s because it is just plain delicious.  The dish is also very easy to prepare and uses ingredients found in most Japanese kitchens, so you can see why it’s a regular on so many menus.  Now it can be a regular in your household too!

White miso paste- check!
Mirin (sweet cooking wine)- check!
Agave nectar- che….wait, huh? (read on for the recipe!)

J loves it when I make Japanese food, so I thought I would surprise him with this dish.  I kind of mixed things up a little by adding Ginger and Garlic Braised Boy Choy as a side dish, since I rarely even buy boy choy.  I have nothing against it, it just doesn’t fall on my “must-have” items, but one of my new year’s resolutions is to start cooking more creatively (read: stop making the same things!) so I’ve been making an effort to pick up items I wouldn’t normally buy.  Hello boy choy, welcome to my kitchen!

So I used Irish blogger Donal Skehan’s recipe for bok choy.  I know…you’re like, “An Irishman’s recipe for Chinese cabbage?”  I’ve been reading more Irish blogs since my sister moved there (and became an Irish blogger herself) and it happened to catch my eye, plus it looked pretty authentic to me, so why not?!  Also, Donal seems to have such respect for vegetables (he grows his own bok choy) and I liked how the recipe let the cabbage shine more than anything (oh, another thing- this guy is poised to become the Jamie Oliver of Ireland- no joke- check out his blog!).  It was simple, came together quickly and was delicious to boot.  I had such great luck with it, perhaps next time I need to make colcannon I’ll get the recipe from a Chinese blog.

On to the salmon!  I made a simple mixture of white and red miso paste, agave nectar (instead of sugar- it’s already liquid and mixes better, plus it’s better for you!), minced ginger, a touch of sesame oil, mirin and a touch of soy sauce and slathered it onto the salmon fillets to marinate in the refrigerator for an hour.

After a few minutes under the broiler, it was done, and the ginger aroma wafted through the house…yum!

To add a bit more “meat” to the meal I sauteed some sliced shiitake mushrooms in a tiny bit of butter, then splashed it with mirin and soy sauce.  Serve everything with a nice, heaping scoop of fluffy brown rice and you’ve got a quick and healthy meal, but mostly you’ll make it because it tastes really great!

Miso Glazed Salmon

2 TBS white miso paste
1 TBS red miso paste
1 tsp dark toasted sesame oil (make sure it’s dark- the light totally lacks the flavor necessary to make this)
1 1/2 tsp agave nectar (if you use honey, make it 2 tsp since it isn’t as sweet)
2 tsp minced ginger
1 TBD mirin (Japanese sweet cooking wine- you could use sweet vermouth or sake)
1 tsp soy sauce
4 6-ounce salmon fillets, skin off or on, depending on your preference

Mix the first seven ingredients together in a bowl until smooth and well combined.  Put the salmon in a dish and slather the entire mixture onto all sides of the salmon.  Cover and refrigerate for an hour (you could do it less if you like, but I think an hour is good!).

Preheat your broiler, cover your cooking surface (sheet pan, etc) with aluminum foil (for easy cleanup!) and spray the foil with cooking spray.  Lay the salmon skin-side down if you have skin on it, making sure to leave a nice coating of the marinade on the fish and broil for about 4 minutes.  Flip the salmon carefully and broil for another 3-4 minutes.  Alternately, you could do this in an oven- 425 degrees, 4 minutes per side.

Garnish with sesame seeds if you like, and serve.  I highly recommend serving it on a hot pile of rice (brown, white, jasmine, whatever!) since the miso glaze goes really well with it.

Recipe: Healthy Lasagna (made with tofu!)

In my last post, I wrote about tweaking recipes in order to make them lighter and/or healthier. In the comments section, fellow Los Angeles food blogger Diana mentioned she often does the same thing, and was recently thinking about trying out tofu as a substitution for ricotta cheese in lasagna (adding that it might be a “crazy” idea!). Not so crazy, Diana (and PS, great minds think alike).  I’ve used tofu as a substitute for ricotta for about two years now, and I’m not sure what prompted me to try it, but I find it works pretty well in place of cheese and other creamy elements in a dish. I happened to make lasagna last night, so I figured it was the perfect opportunity to finally post about it.

Now, I’m sure there are a few Italian grandmothers rolling over in their graves….although, come to think of it, real, authentic lasagna doesn’t even contain ricotta but instead is layered with béchamel, cheese and sauce, so maybe it’s safe to post the tofu idea here.  I never did like the thick, brick-like layers of heavy ricotta in lasagna too much but feel it definitely needs a creamy element, so tofu is a lighter yet still substantial way to achieve that. Don’t get me wrong- I don’t always want a lighter version of lasagna, but if I’m making it at home on a weeknight, I figure it’s a good way to watch the calories. And honestly- it’s really, truly delicious and you won’t miss the ricotta! I do use real, high-quality parmigiano-reggiano in this because a little goes a long way, and to me it’s essential in the flavor of a good lasagna. That said, when combined with whole wheat lasagna sheets and fresh marinara sauce, this lasagna is almost as healthy as a turkey sandwich so you won’t have to feel like you’re overindulging. It’s true!

There are a couple of important things to remember when using tofu instead of cheese. 1) It requires a bit of planning ahead since you have to strain the tofu, preferably overnight and 2) Season, season, season! Tofu doesn’t have much flavor on its own (ok, it’s basically flavorless) so be generous with your salt and other seasonings.

Here’s the list of ingredients, followed by a step-by-step recipe with photos.

1 14 oz package of SILKEN tofu (don’t buy firm, extra firm…make sure you get the silken tofu!)
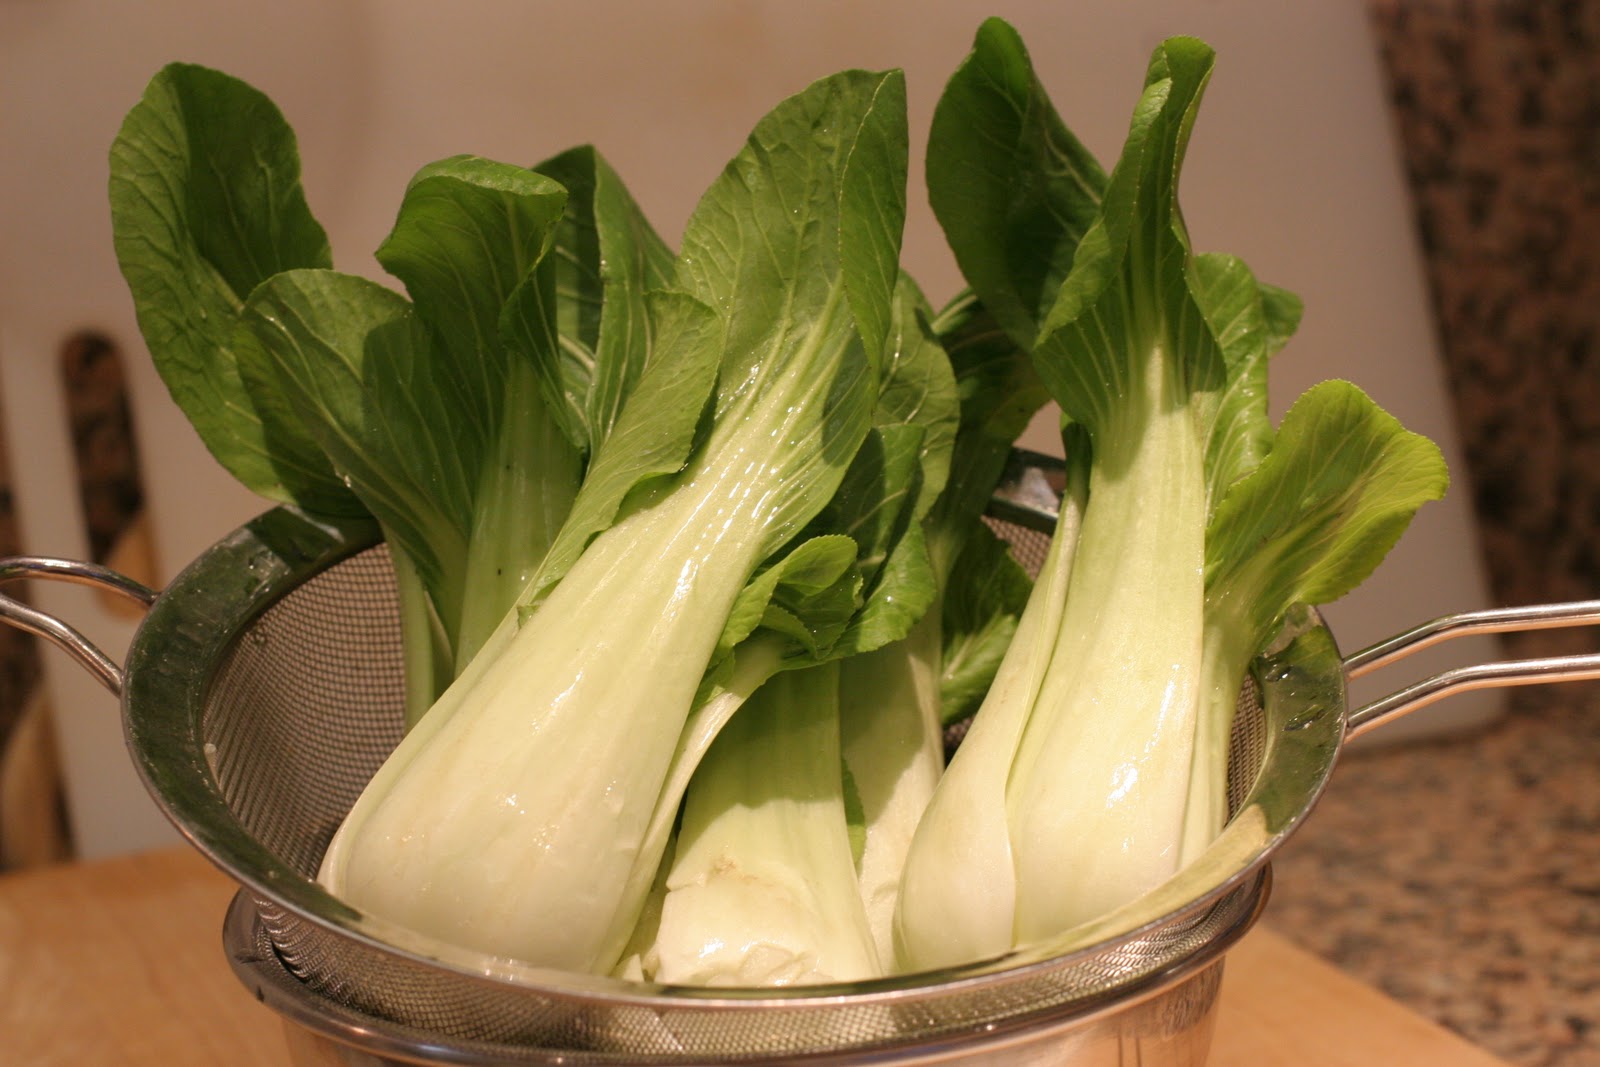
1 bag baby spinach
¾ cups grated parmigiano-reggiano, divided
1 ½ tsp Kosher salt
½ tsp black pepper
5-6 leaves fresh basil
1 egg
3 links Italian-style turkey sausage (I used Jennie-O spicy Italian turkey sausage)
5 to 6 cups of your favorite marinara sauce (I used homemade- Mario Batali’s recipe is my go-to sauce- I just make a big batch and freeze it in several containers and pull them out as I need them)
1 package no-boil lasagna noodles (I used whole wheat)

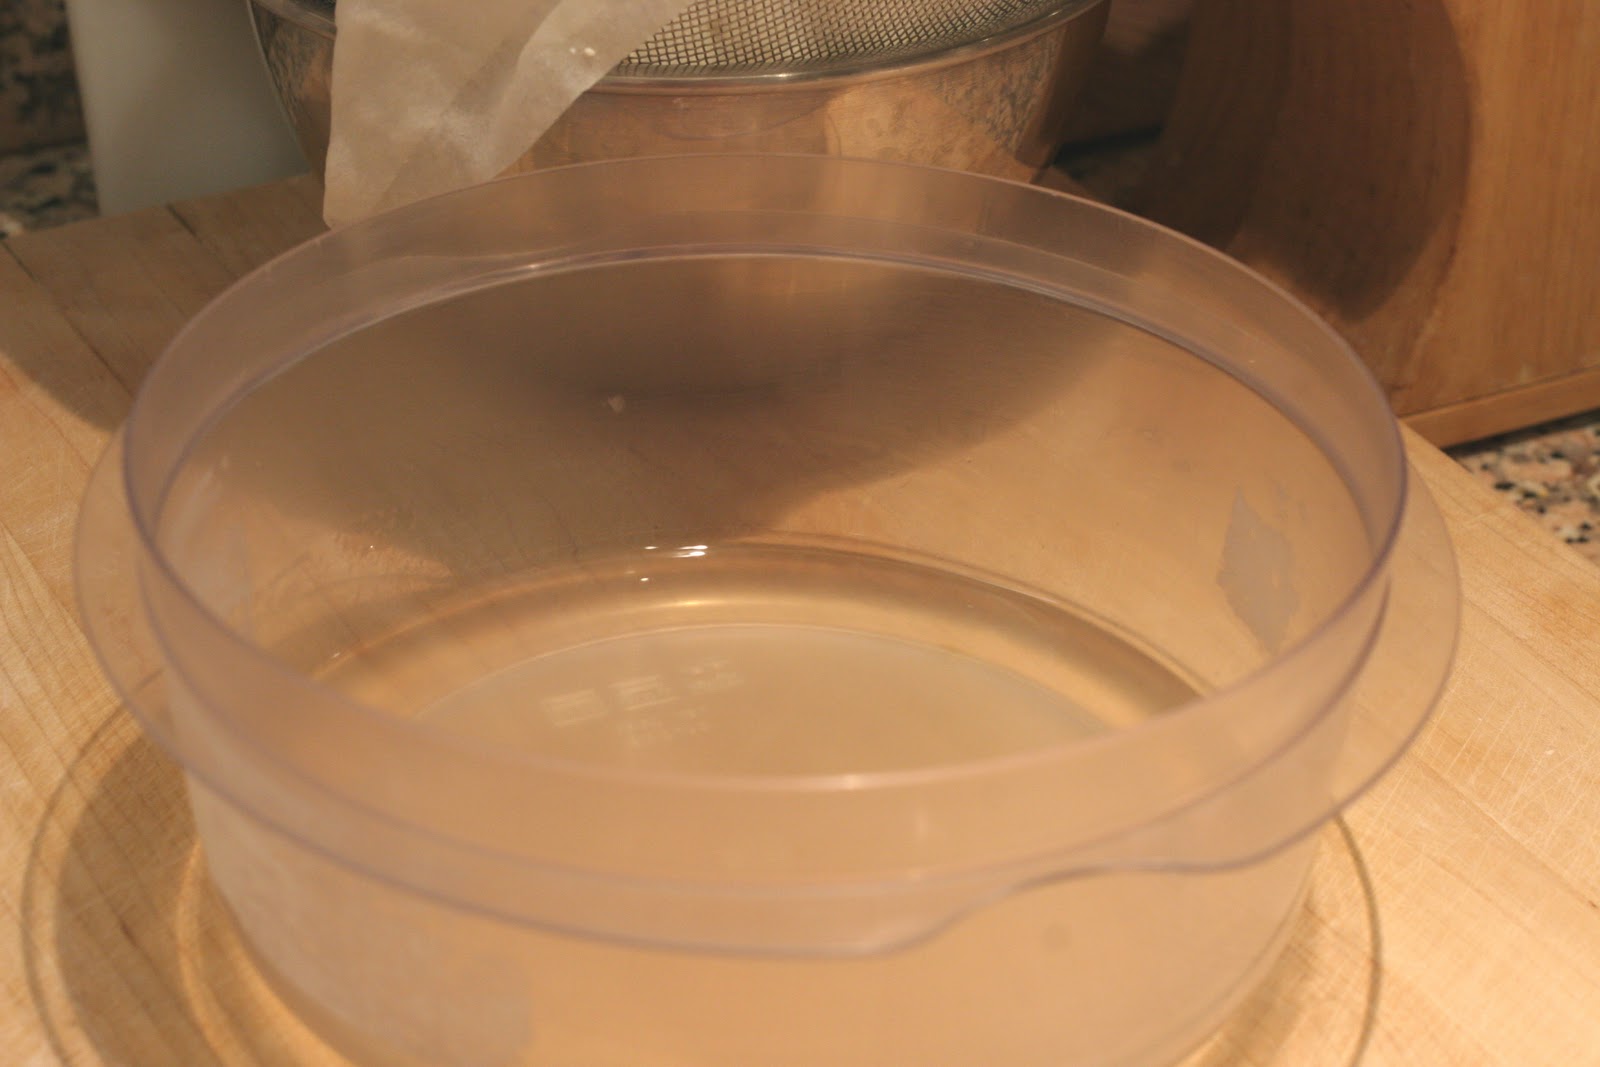
The night before: Scoop the tofu into a fine meshed sieve lined with cheesecloth or a sturdy paper towel (like Viva). Cover it with the overhanging cheesecloth or paper towel; set another smaller bowl on top to weigh it down slightly and leave in the refrigerator to strain overnight.

The next morning, you’ll probably have almost a cup of liquid- all drained from the tofu!  I’m not sure if you can see all of the liquid in the photo above, but it’s a good amount.  If you don’t strain it, all of that liquid will make for a soggy lasagna, and who wants that? 

Preheat the oven to 425.

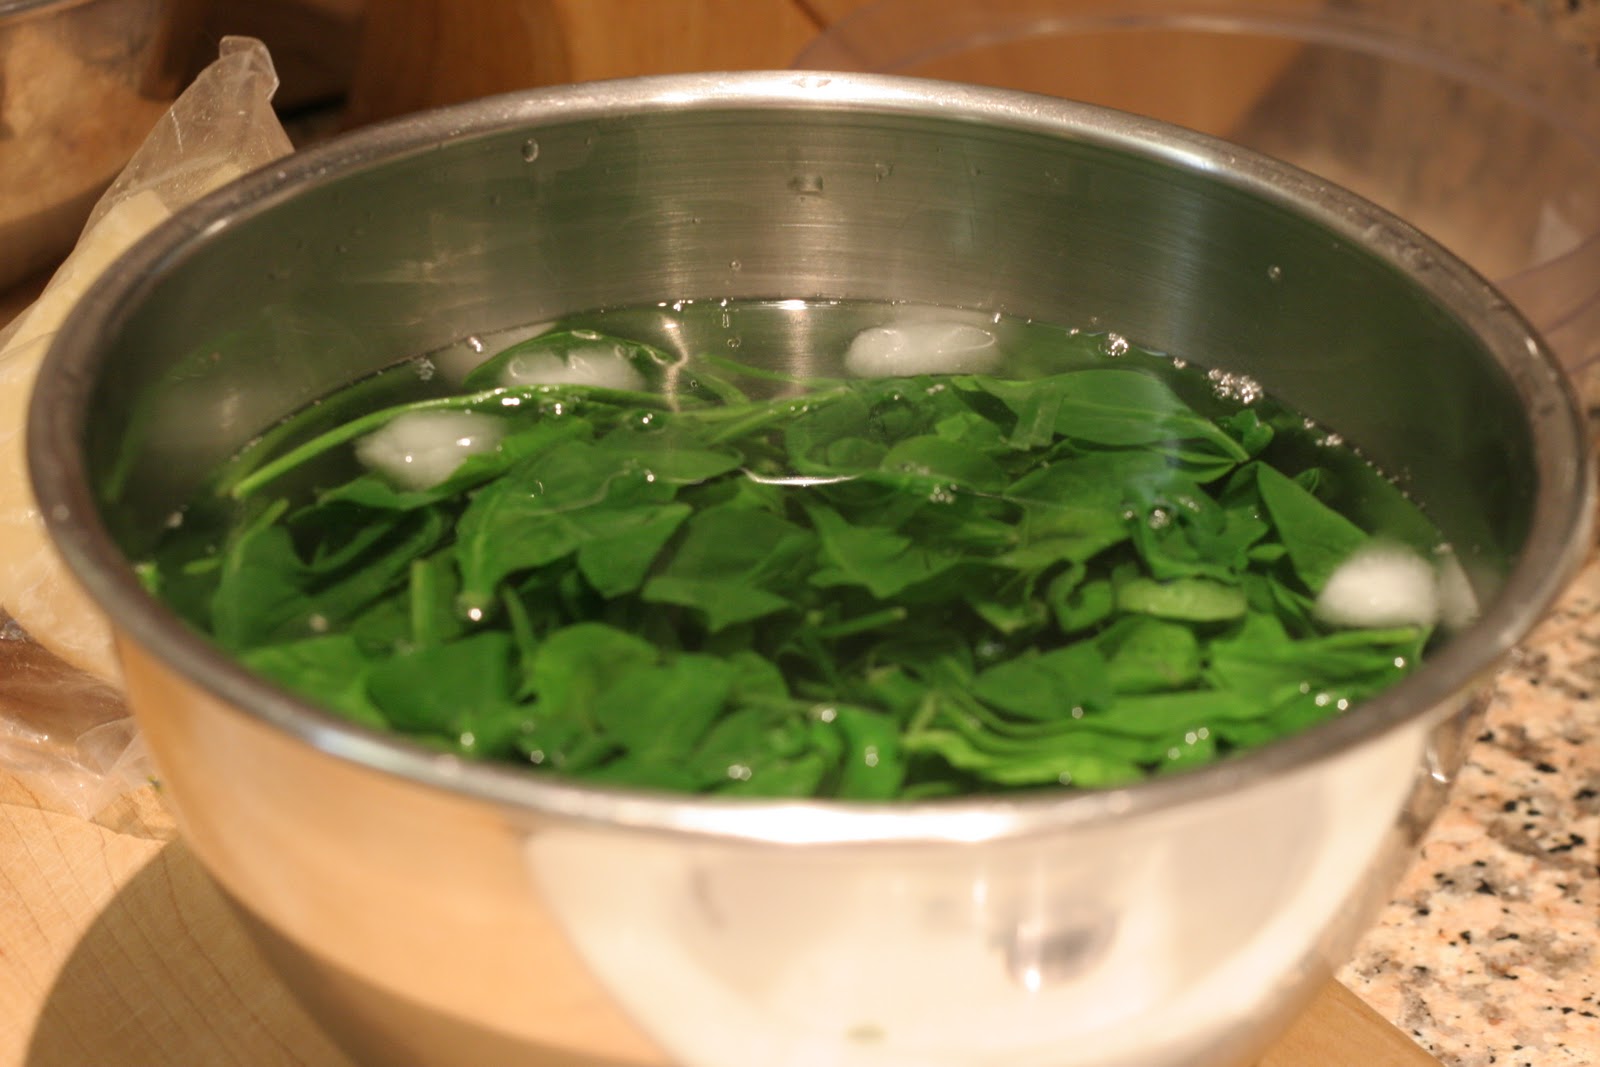
Bring water to a boil in a pot; add the spinach for just 30 seconds, then put the spinach in an ice-cold water bath. Once the spinach has cooled, squeeze out all of the water.

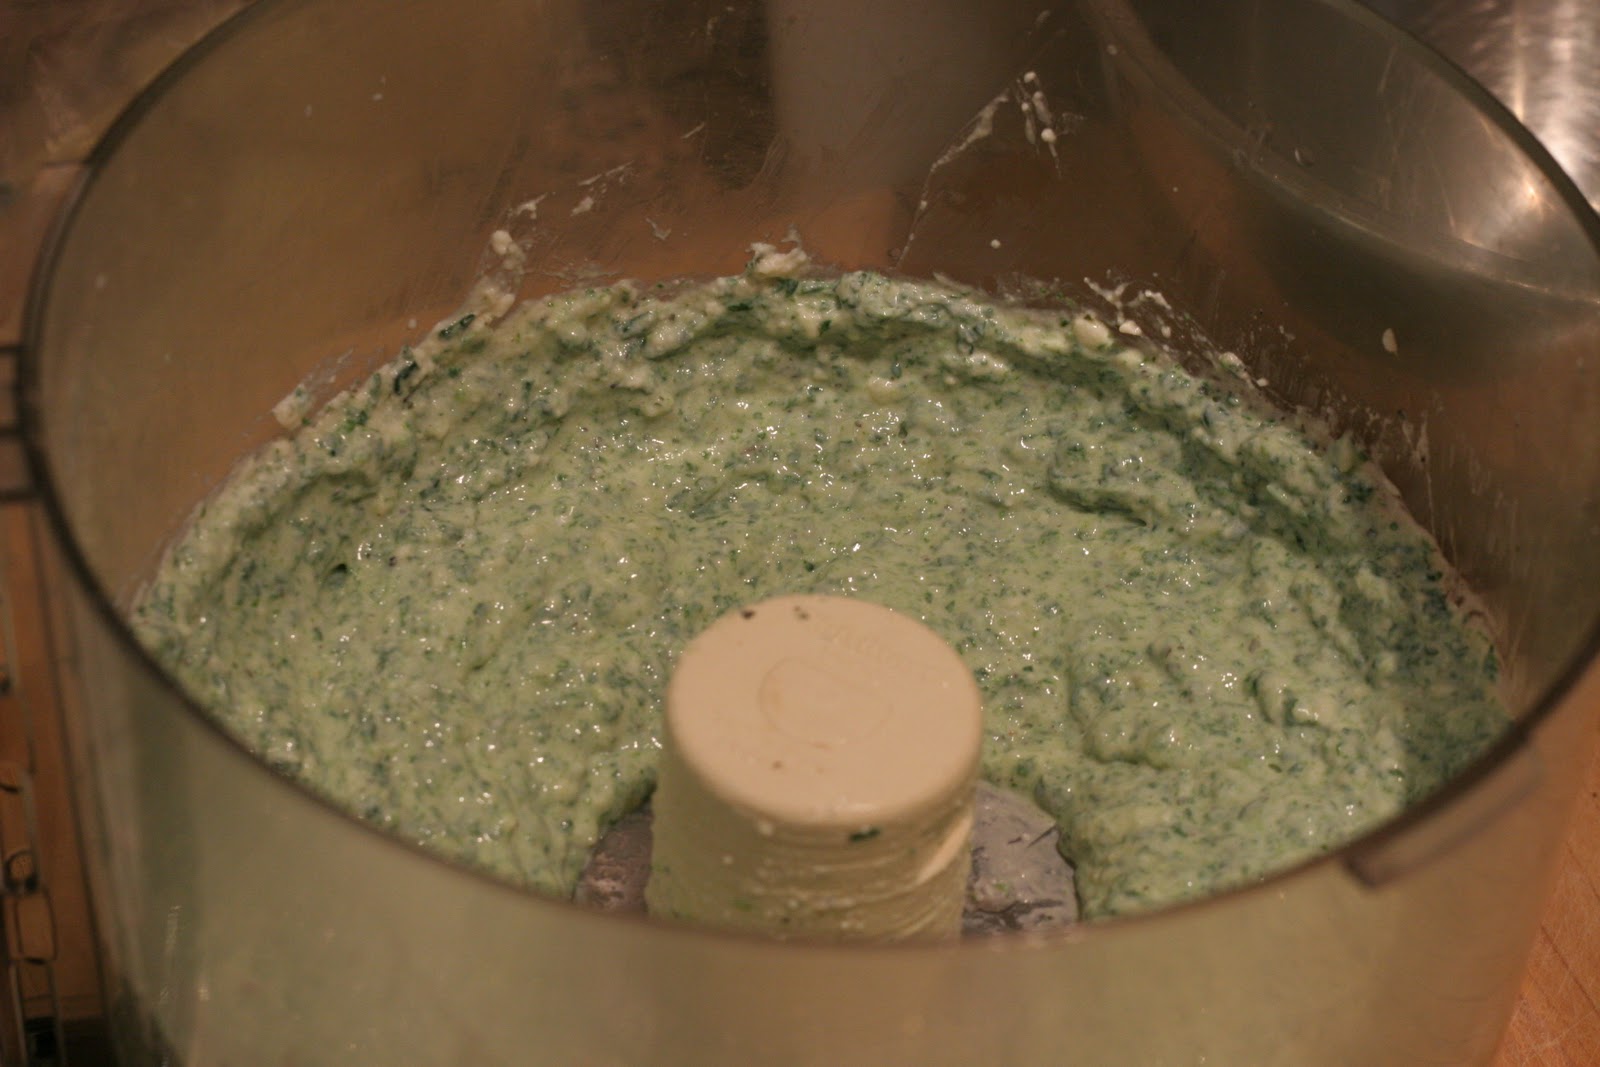
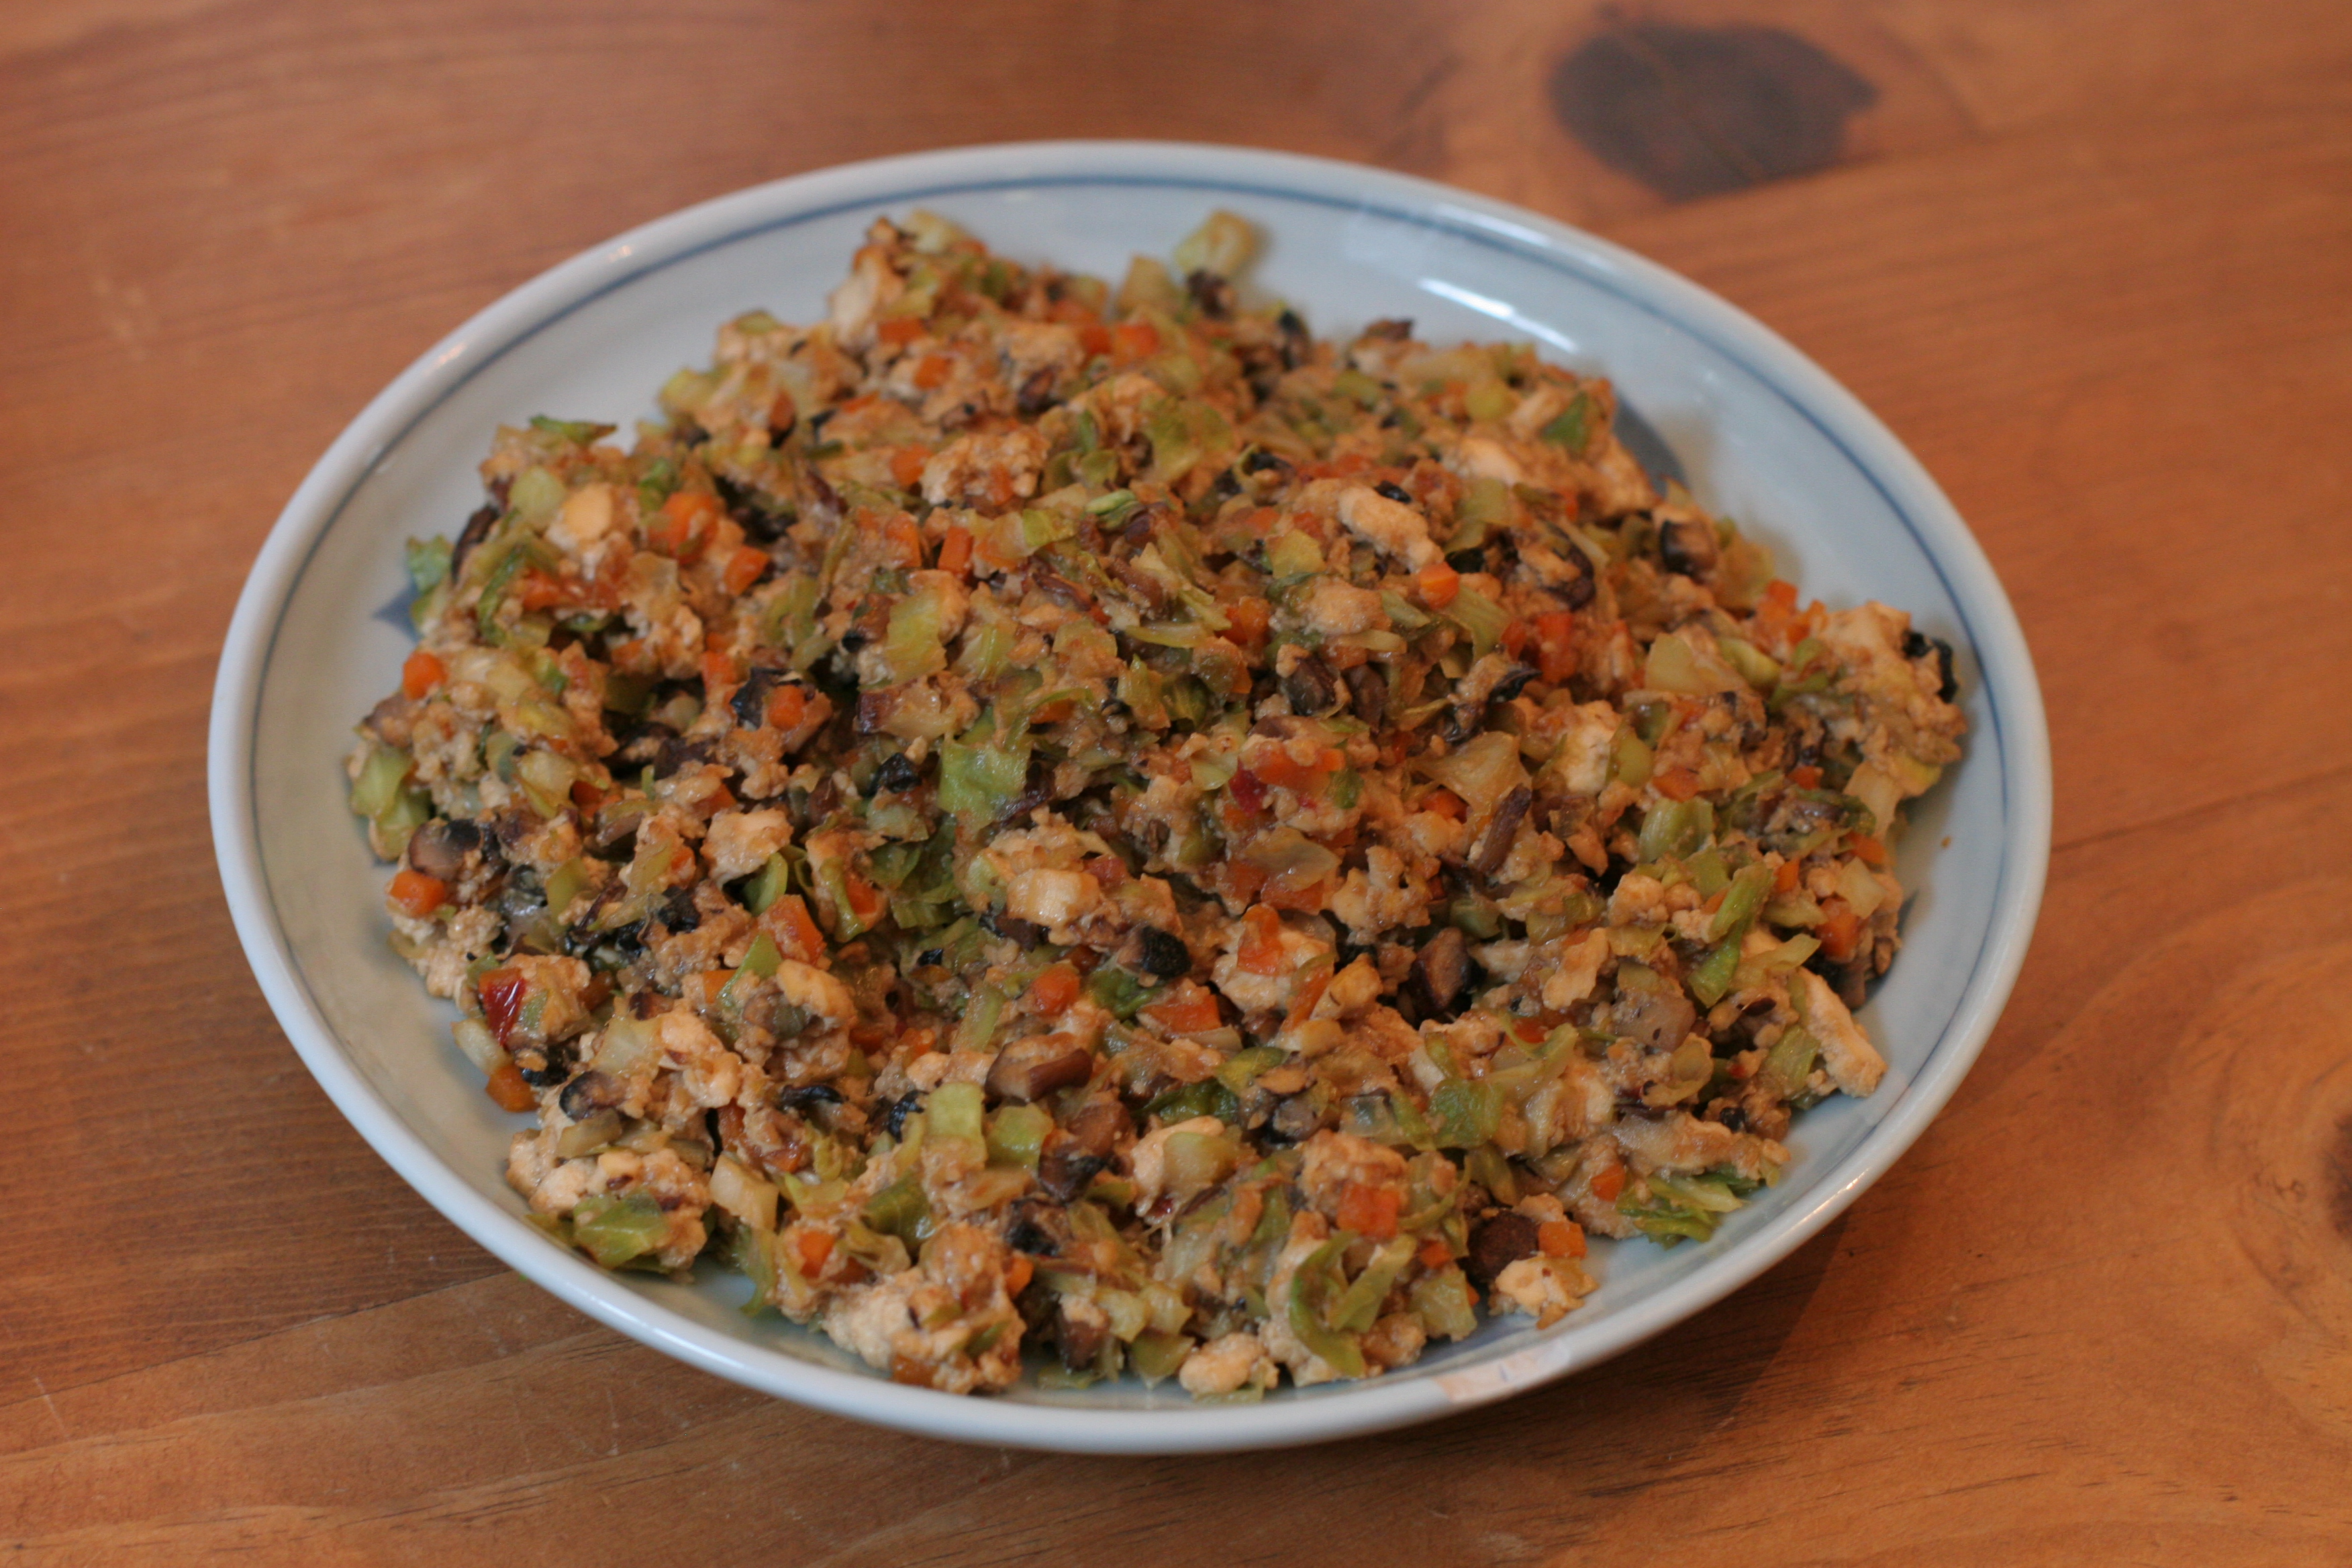
Put the strained tofu in the food processor along with the spinach, half the parmesan cheese, salt, pepper, basil and egg. Whiz until smooth. Set aside.

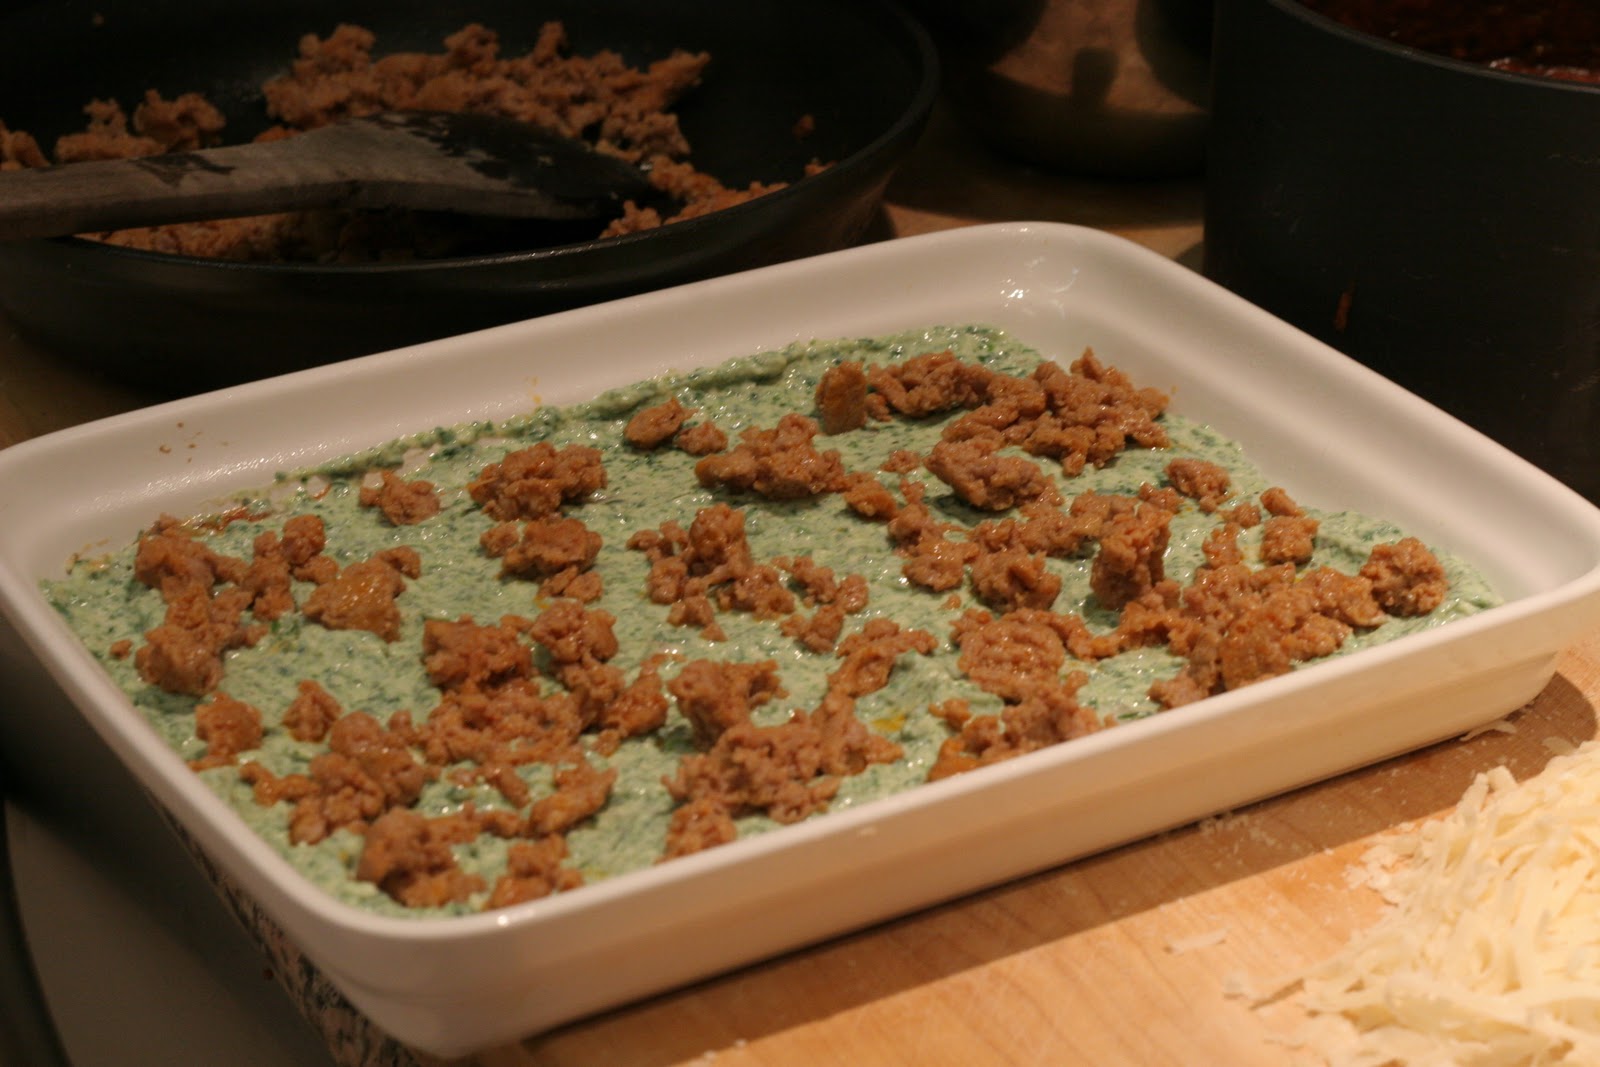
Heat up a medium sauté pan. Take the turkey sausage out of the casing.  The easiest way is to just slice the casing open with a sharp knife, then ‘unwrap’ the meat inside directly into the pan. Break up the sausage until it crumbles and is fully cooked; set aside.

Side note: You can use regular no-boil lasagna noodles, but if you want to kick up the fiber, use whole wheat.  I’d never seen whole wheat, no-boil lasagna noodles before (a year ago it was hard to find regular whole wheat lasagna sheets, much less no-boil ones!) but I saw these at Figueroa Produce and snatched them up!  They’re organic AND whole wheat, taste fantastic and have no grainy texture at all.

Set up your work station: Line up your 13 x 9 (I used a slightly smaller one) baking dish, the tofu mixture, the crumbled sausage, marinara and remaining parmesan cheese.

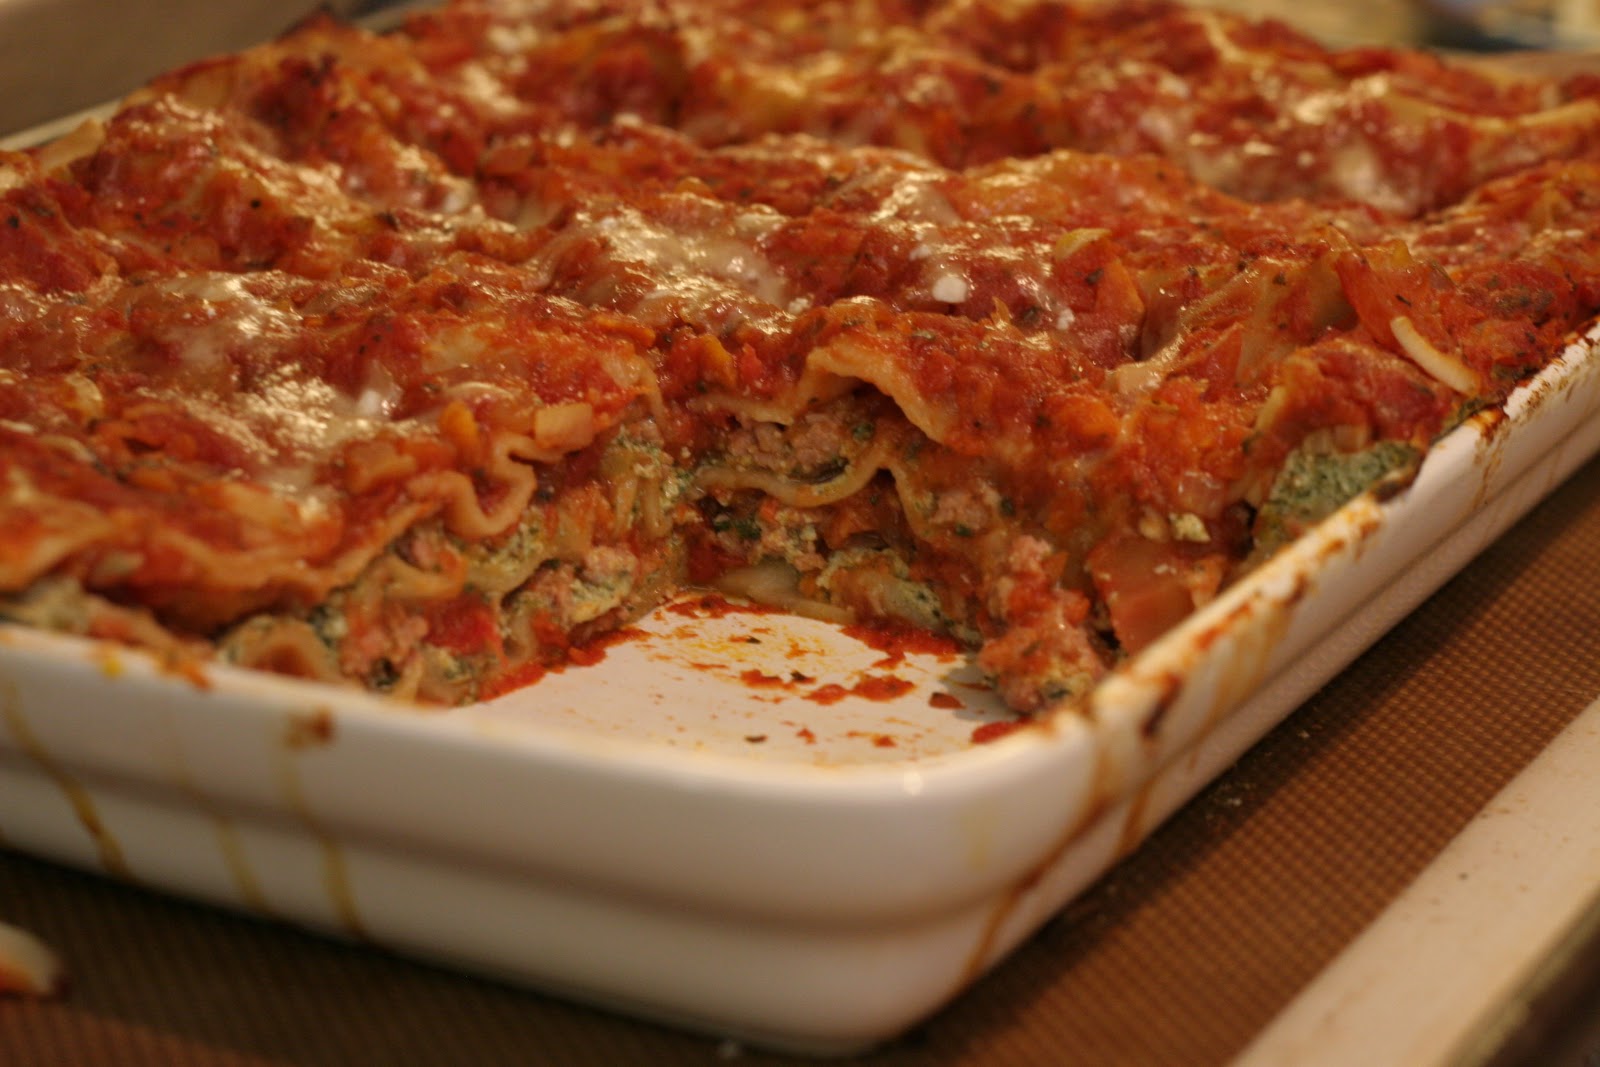
Spray the baking dish and start by putting about ½ cup of marinara at the bottom of the dish. Top with 3-4 no-boil noodles, making sure not to overlap, then top that with about ¾ to 1 cup of the tofu mixture, 1/3 of the crumbled sausage, a light sprinkling of parmesan and repeat until you have three layers.

Of course you can make as many layers as you wish; just make sure to finish off the top layer of lasagna noodles with marinara sauce and a nice handful of grated parmesan. I like to leave the corner edges exposed without sauce- even with no-boil noodles, you get nice, crispy edges so I highly recommend you try it that way!

Cover the baking dish with foil (or use a bigger baking dish, like I did, since my lasagna was layered right to the very top of the dish!) and bake for 40 minutes.

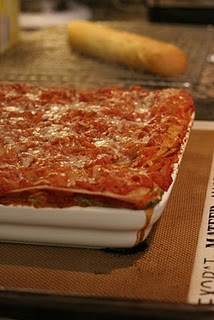
Uncover the lasagna and bake for another 15 minutes until the edges are crisp and the top is golden brown.

Let the lasagna sit for about 15 minutes before slicing. Enjoy!

If you wanted to leave the spinach out and add in more basil to make a more herbaceous tofu mixture, you could do that as well.  It’s really up to you- if you wanted it to be garlicky toss in a few cloves before processing, or even squeeze in some roasted garlic for a rounder, milder flavor.  You can also make it vegetarian by leaving out the turkey sausage, or use pork sausage instead of you have a love affair with The Pig.  The only rules you need to stick to are to strain the tofu, squeeze out any excess liquid from whatever vegetables you add and make sure to use the egg (it firms up the tofu layers nicely). 

If you try this, let me know what you think!  Personally, I love this version, and I hope you enjoy it too.

Recipe: Healthy Chicken Parmigiana

 I’m always looking for ways to tweak recipes of my favorite dishes so they’re a little bit healthier by reducing the fat or upping the fiber. Don’t get the wrong idea- I’m not going to present some dried-out hockey puck and try and sell you on the merits of how healthy it is. Healthy food has to taste good in order for one to want to eat it, and I do believe that it has to at least resemble the original dish.  I mean, I might like kale chips topped with some chopped tomatoes and garlic but don’t even try and tell me they’re called ‘nachos,’ ok?


Chicken Parmigiana is something my dad would make for me when I was a kid, and the combination of crispy fried chicken cutlets, tangy marinara and oozing cheese makes it a favorite comfort food. I hardly ever deep fry (or even shallow fry, actually) at home, mostly because it’s too much trouble on a weeknight and also because I do have a fear of doing it incorrectly and ending up with loads of oil soaked into my food. I’ve found a way to get a nice, crisp breaded chicken without deep frying, so I thought I’d share my recipe with you. PS: This breaded chicken on its own, sans sauce and cheese, makes a great main dish too- just serve it atop a mixed green salad!

Healthy Chicken Parmigiana
Serves 3

3 boneless, skinless chicken breasts

Salt/pepper

2 to 3 slices of whole grain bread, lightly toasted and cooled

¼ cup grated Parmigiano-Reggiano (buy and use the real stuff – it isn’t cheap but a little goes a long way and it makes a huge difference!)

Small handful of flat Italian parsley

2 eggs, beaten

1 ½ cups marinara sauce

¾ cups grated skim milk mozzarella cheese

Few leaves of fresh basil

Cooking spray

Preheat oven to 400.

Put each chicken breast in a large Ziploc bag; pound each breast until they are about ½ inch thick. Liberally season each side with salt and pepper, set aside.

Make the coating with whole grain bread: I use whatever I have in the freezer- the ends of various loaves of whole grain or wheat bread. Just toast them lightly, then whiz them in your food processor along with salt and pepper and the parsley. Once it’s processed, add the parmesan cheese just to mix, then pour bread crumb mixture into a dish.

Whisk the eggs in a baking dish and set up your dredging station: Chicken, egg, breadcrumb, baking rack.

Take each breast, coat it well in the egg, then dredge in the bread crumbs, pressing down on each side so it gets a nice, even coating. Set on the baking rack repeat with the two remaining chicken breasts.

Heat up a large sauté pan with cooking spray; cook chicken breast about 3-4 minutes on each side until golden brown. Lightly coat a baking sheet with cooking spray and put the chicken breasts on it; top each chicken breast with ½ cup of marinara sauce and ¼ cup mozzarella and put into the oven for about 3-4 minutes until the cheese is melted.

 
Serve with pasta (save a little sauce for that) or sauteed broccoli, a green salad and some red wine, like I did!


Leftovers make great sandwiches too.  Enjoy!

Quick And Easy: Shrimp Soft Tacos


Over the weekend, I attended Artisanal LA, a gathering of local food artisans showcase their handmade items. I sampled a LOT of yummy food, met some incredible people and took many photos, so I’ll be posting more about the event later. In the meantime, I got a chance to use one of the things I purchased while I was there and I wanted to share it with you.


Chef Zarate (of Mo Chica fame) was selling one item- a Peruvian salsa called anticucho. The minute my parents and I tasted a bit of the fiery marinade we all decided to bring a bottle home. At the moment I wasn’t sure what dish I’d use it for, but when I got a sudden craving for shrimp tacos the next day, I thought of the anticucho and got cooking.

Since I used a bottled marinade, I don’t really have a recipe for you, but if you don’t use something pre-made you could always dust your shrimp with a mix of chili pepper, a touch of cayenne, cumin, ground coriander and garlic, then sear them off. I tossed my raw shrimp with the
anticucho, salt and pepper and let them sit for about 30 minutes before cooking them quickly in a hot pan.


After making a quick cabbage and red onion slaw by tossing the veggies with some cumin, rice wine vinegar, ground coriander, salt and pepper I put nice, heaping piles of it on warmed flour tortillas and topped that with the shrimp. I finished each taco off with a creamy dressing made from smashed avocados, greek yogurt and a touch of Kewpie mayonnaise.

The
anticucho added a great kick to the tacos, and I’m looking forward to trying it on flank steak, chicken and fish. Now I wish I would have bought 10 bottles!


Recipes: Meatballs Marinara + Garlicky Kale Bruschetta


Lately, I’ve become the kind of person who’d rather eat a little bit of many things, rather than a lot of one thing. At restaurants, I usually prefer to order two or three appetizers than feast over a big entrée, and I’ve never met a tapas bar I didn’t like. I also find that appetizers tend to be more interesting than main dishes, but that’s just my opinion. How else am I going to get my tuna tartare and caramelized onion pizza and asparagus with a poached egg in one sitting? Food rules be damned, I love to mix and match mini foods into the perfect meal.

At home, it’s a little harder to eat this way, since it requires preparing several different dishes. However, with a little extra thought and planning, it’s totally possible, and I made one such meal the other night.

I used my last bit of ground turkey to make mini meatballs which I seared off before letting them braise in some homemade marinara sauce.

In addition to mini meals, I like mini pots, like this one J bought me last year. Cute right?!
The black kale I’d purchased at the farmer’s market last weekend was going to be part of a farro salad, but I just wasn’t feeling it and remembered reading about an Italian bruschetta made with greens- perfect for a little tapas-style dinner- so I just made my own version of that:

Roasted baby carrots pop up often on my menus because I love how sweet and concentrated they get in the oven:

J uncorked a bottle of Chianti and we enjoyed our multi-mini-meal very much.

Turkey Meatballs Marinara

½ pound ground turkey (lean, not extra lean, works better since it still contains a bit of fat)
½ onion, diced
1 garlic clove, minced
1 tsp thyme
Splash of red wine (optional)
3 large basil leaves, chopped
2 TBS chopped Italian parsley
1 slice of bread soaked in ¼ cup of milk
¼ cup grated parmigiano reggiano
Salt and pepper
2 cups of your favorite marinara

Put the ground turkey in a medium bowl, set aside.

In a small pan, heat up a bit of olive oil and sauté the onions, garlic and thyme until the onions are soft. Add a splash of red wine, cook until it is completely evaporated. The onions will be nice and red!

Add the onion mixture, basil and parsley to the turkey; take the bread soaked in milk and break it up with your fingers and add that to the turkey as well, then add the parmesan, salt and pepper. Incorporate all of the ingredients with your hands.

Make the turkey mixture into 1 or 2 inch meatballs. Heat up some olive oil in a pan and sear the meatballs on all sides. Once they are brown, add the marinara, turn the heat down to low and let the meatballs simmer in the marinara for about 10 minutes. If the marinara is too thick you can add a bit of chicken broth, red wine or even water to thin it out a bit.

Garlicky Kale Bruschetta

1 TBS olive oil
4 garlic cloves, sliced thin
A pinch of red pepper flakes
1 bunch black kale, ribs removed, chopped
Salt, pepper
Splash of balsamic vinegar
6 slices of multigrain bread, baguette, whatever bread you like, brushed with olive oil and toasted.

Heat the olive oil in a pan on low heat, then add the garlic and red pepper flakes to the oil. Don’t burn the garlic, but let the warm oil infused with the flavors for about 2 minutes.

Add the kale to the pan and toss with the oil/garlic/flakes. It will wilt pretty quickly. Add salt and pepper to season. When the kale is nice and wilted, add a splash of balsamic, stir again. The balsamic will reduce very quickly. Turn off the heat.

Top each slice of toast with a mound of the kale mixture. Enjoy!

Recipes: Butternut Squash Soup and Turkey Stuffed Mushrooms

After over a month of letting this here blog lie dormant, I’m back (again!) and hoping to update more frequently. The redesign isn’t really much to write home about, but I wanted a brighter, lighter look for Tuna Toast and this is what I came up with! So I hope you’ll come back around and check it out from time to time.


Cool weather is upon us, even here in usually-sunny Los Angeles. I’ve always loved cooler weather, and it’s nice to actually feel the seasons change for once! Watch, now that I’ve said that we’ll get some freaky heat wave next week which wouldn’t be too surprising, but I hope the grey clouds stick around because it’s more fun to spend long hours in the kitchen.


One of my favorite things to make this time of year is butternut squash. Sometimes I’ll just roast it and eat it with garlic, salt and pepper; other times I’ll toss it with farro and make a warm, fall salad. Last night was particularly chilly and it made me crave soup, so I decided to prepare a pureed butternut squash one that I’ve made in the past. It’s pretty simple and involves only a few steps.

To go with the soup I made another staple – stuffed mushrooms. I love making these because you can tweak them based on whatever you need to use up in your refrigerator or pantry; this time I had some leftover ground turkey so I made them meat-based, although they’re perfectly good vegetarian style as well.

I’ve included the recipes for both, and if you add some garlic-rubbed multigrain bread and a green salad, it’s a healthy and hearty supper, perfect for fall.

Pureed Butternut Squash Soup

1 small to medium butternut squash
3 cloves of garlic, peeled but left whole
1 TBS olive oil
1 medium onion, diced
3 ribs of celery, diced
4 to 5 sage leaves, chopped (you can use a teaspoon of dried if you don’t have fresh)
4-5 cups low salt chicken broth or veggie broth
Salt and pepper

Preheat oven to 400. Peel the butternut squash, cut in half lengthwise and use a large spoon to scoop out the seeds. Chop the squash into 1 inch cubes and toss in a bowl with the garlic cloves, olive oil, salt and pepper. Lay onto a sheet pan and bake for 40 minutes, or until tender.

While the squash is roasting, heat a bit of olive oil in a pot and sauté the onions and celery with some salt and pepper until translucent; add the chopped sage and stir. Add the stock and bring to a simmer.

When the squash is ready, add it and the garlic cloves (which will be buttery soft at this point!) to the pot, bring to a simmer, turn off the heat. If you have a hand immersion blender, use it to puree until smooth; alternately carefully ladle the hot soup in batches into a blender and puree until smooth. Reheat and serve.

Turkey Stuffed Mushrooms

6-8 larger crimini or button mushrooms
1 clove garlic, minced
¼ onion, minced
2 sage leaves, chopped (you can use ¼ teaspoon dried if you don’t have fresh)
½ teaspoon thyme
Splash of vermouth or sherry (optional)
¼ pound ground turkey
Salt and pepper

Preheat oven to 375.

Pull the stems from the mushrooms, then use a spoon to scoop out some of the gills. Mince the gills and the stems, set aside.

Heat the olive oil in a small pan and add the garlic, onions, minced mushroom stems/gills, sage, thyme, salt and pepper and sauté until soft; add a splash of vermouth or sherry if using until it evaporates. Set mixture aside to cool a bit.

Spray both sides of the mushroom caps with cooking spray or drizzle with a bit of olive oil, and season both sides with salt and pepper. This is very important since mushrooms tend to be pretty bland and they need the seasoning!

In a small bowl, combine the ground turkey with the cooled mushroom stem mixture, then take a small spoon and scoop it into each mushroom caps, rounding the tops out.

Place the filled mushrooms on a baking sheet coated with cooking spray; bake 15-20 minutes depending on the size of your mushrooms.

Note: If you want to make these vegetarian, increase the amount of onion to 1/2 of one, then add 1/4 cup bread crumbs and a tablespoon or so of egg (add more if you need more moisture) to the onion/mushroom stem mixture and fill the caps with this.

Enjoy!

Something Out Of Not Much

6:00 PM, Saturday night: Despite having an 8:30 PM reservation to one of Los Angeles’ most beloved restaurants (Sona- to which neither of us had ever been), J and I found ourselves in a heap on the sofa, exhausted from running around in unusually muggy weather all day. We got into the do-you-wanna-go-well-I-don’t-care-what-do-you-wanna-do? conversations which basically made us realize that a pricey restaurant like Sona should be saved for a time when we were totally feeling it. J tuned into the Raider game while I stared glumly into the refrigerator (I know mom- I shouldn’t stand in front of the fridge with the door open!) wondering what to make. Since I’d assumed we’d go out for dinner I hadn’t really done my grocery shopping, I was looking at a few veggies in the drawer, plus an array of condiments, some random nubs of cheese and one baked chicken breast that sat alone in a Tupperware. Not very promising.

Upon further investigation (read: I looked in the freezer) I found a badly beaten up Whole Foods ready-made pizza crust that was bent out of shape and hiding underneath bags of frozen corn and a bottle of vodka. At least I had a jumping off point now! I took it out, saw that it was intact and let it thaw back into its normal flat shape on a cutting board.

Since I didn’t have any marinara or pizza sauce, I decided to do a kind of white pizza with what I had. After combining some sour cream, grated parmesan, grated gruyere, 1 egg yolk, lots of cracked black pepper and chopped basil into a paste, I spread it onto the thawed crust all the way to the edge, then covered the whole thing in thinly sliced zucchini which I’d salted and drained. Dinner was starting to come together! A grating of parmesan finished up the “flatbread” as I like to call it, and I popped it in the oven.

I was lucky enough to have one ear of corn and one gigantic tomato which came together, with some basil, to form a simple salad. Then I took the lone chicken breast and made a chicken salad and thinly sliced what I had left of a baguette to serve with it. I normally don’t do the carb/carb dinner combo, but it seemed to make sense!

So, this is the dinner that came out of having to create something with what was there, and it turned out pretty well!

I think I’ll try to do this more often- instead of buying more groceries, just try and create a meal out of what’s already there. It forces you to be creative, and is a good way to use up leftovers.

What’s in your pantry/fridge?